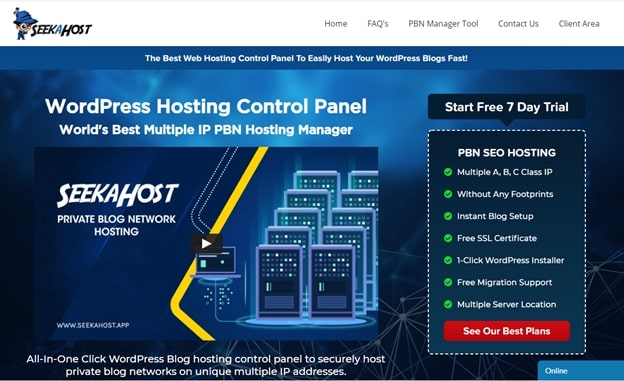
If you want to build multiple blogs with a unique IP address, then choose SeekaHost.app control panel. The easiest way to host private blog networks (PBN) is by using the SeekaHost.app blog hosting control panel.
In this article, I am sharing my experience of how I used SeekaHost.app for building successful PBNs. So long it has been an exciting journey with the SeekaHost.app dashboard. Taking this journey forward, I tried the PBN hosting, and trust me I simply loved it.
What is a Private Blog Network?
There has been a myth that a PBN gets your blog penalized by Google. While some SEO experts say that PBN is a black hat SEO tactic to boost site SEO.
Not everything is real what you hear!
At SeekaHost.app, you can build PBNs without violating any Google’s Webmasters Guidelines.
So, what actually is a Private blog network? A PBN is a network/collection of websites with useful content providing backlinks to other/own websites for SEO advantage. These backlinks help other websites rank better with no footprints linking to each other.
Who uses a PBN and why is it Legit?
Bloggers and SEO consultants like me use PBNs. A PBN helps marketers owning multiple blogs to rank websites with a load of backlinks.
If you are finding difficulty in building a backlink, you can build them with a PBN. The most important thing to keep in mind is that PBNs should have legit & top-notch content. If you host PBN with the SeekaHost.app, then there won’t be any trace back to your PBN.
This is what makes SeekaHost.app a suitable option to host private blog networks.
Is PBN Legal?
I won’t say that PBN is a black hat SEO practice, but I won’t say either that it is a white hat SEO practice. Building good backlinks for your sites using PBN is better than asking/paying for backlink from other sites.
If your PBN has low backlinks and you are practicing keyword stuffing, then Google can penalize you. But PBN is not unlawful or illegal, so you can have one if you want to grow your site rankings.
Now, let me show you how you can host a PBN using the SeekaHost.app hosting control panel.
Reasons to Choose PBN at SeekaHost?
Delight yourself with the best-in-class multiple unique IP hosting plans and features at SeekaHost. Here are top-notch features that make SeekaHost a preferred choice.
Security:
Your website is always secured with a firewall and malware scanner. Servers are monitored and updated regularly by implementing the latest technologies.
When you use PBN hosting, you won’t use public nameservers provided by the DNS provider like Cloudflare. You use a private nameserver and that’s where your unique IP will be exposed. In such a scenario, your website security has to be top-notch quality.
Setup Quickly:
As soon as you place your order, you can immediately set up and bring your website up & running. You do not need to wait for long hours, simply register a domain and rule the world.
Single Interface:
How frustrating is it when you have to manage domains and hosting on different interfaces? Not any more!
With the SeekaHost.app control panel, you can manage all your blogs in one interface. This helps you save time and also speeds up your website. Not only the PBN blogs, you can host your real sites with the powerful WordPress hosting plans instead.
This way, you will have everything managed under one unified dashboard.
Multiple Users:
If you don’t have time to manage everything, then you could add multiple users to your dashboard. You could add users and give them access to your account. While your added users manage your account, you could focus on something bigger.
Guaranteed Uptime:
SeekaHost.app doesn’t use cPanel, and the servers are highly secured. So, you won’t have to worry about the uptime and your site will never face a downtime.
Support:
The SeekaHost executives are available 24/7 to answer your queries. The online client portal system resolves all your issues so you can continue your journey happily.
Steps to Host Private Blog Networks at SeekaHost.app
Coming to the main section of this article, let me show you simple steps to launch a PBN.
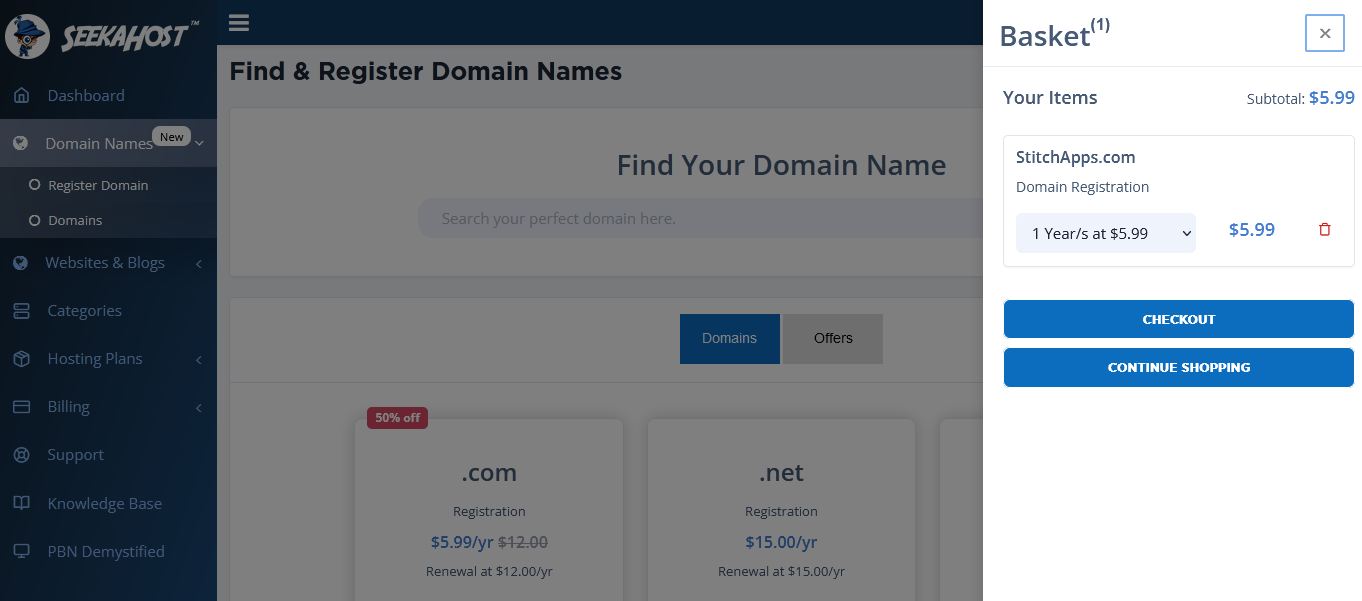
The very first thing is to buy a domain name at SeekaHost at a cheap price. I will show you how to buy a .com domain using the SeekaHost.app control panel. Most PBNs are built using expired domains because such domains already have enough backlinks.
You can find a good expired domain on expireddomains.net
Step 1: Register a Domain Name
To register a domain, enter the domain name in the search box and click on Search. If the domain is available, click on Add To cart.
Then go to the basket and click on Checkout.
Click on Next, and enter your personal information.
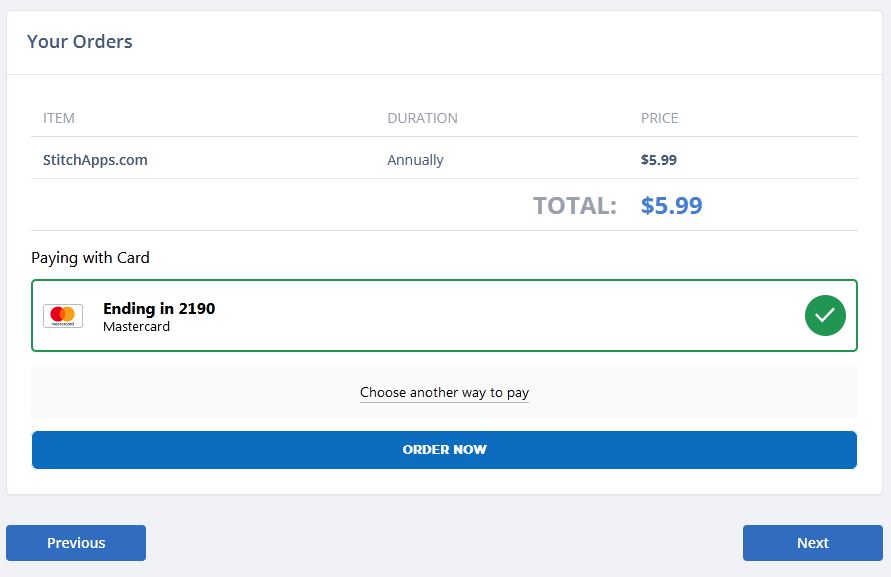
Then proceed with the payment by choosing the preferred payment option.
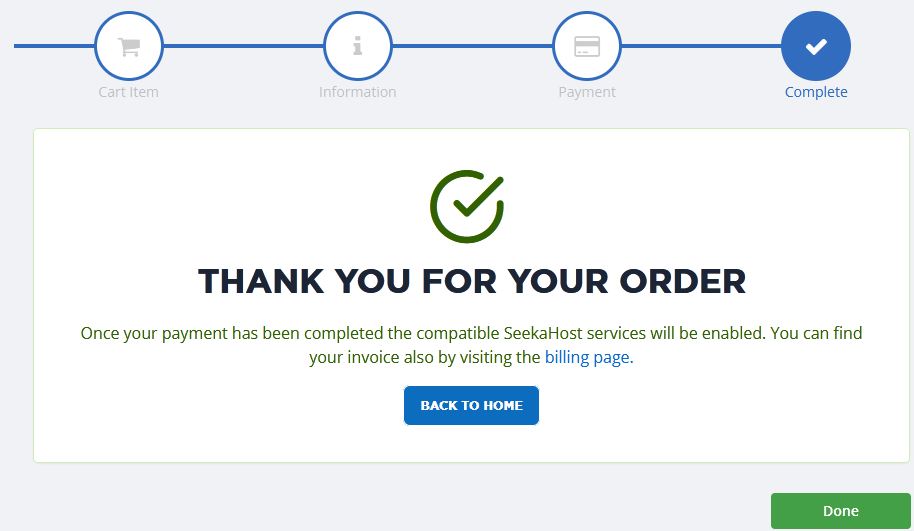
Click on Order Now and the domain is yours. If you see the below result, it means your domain is purchased.
I hope you all must have understood the steps to purchase a .com domain.
Now I will show you how to build a PBN using an existing domain.
Here are the steps:
You don’t need to logout of the SeekaHost.app control panel to add a PBN.
Step 2: Buying a PBN Hosting Plan
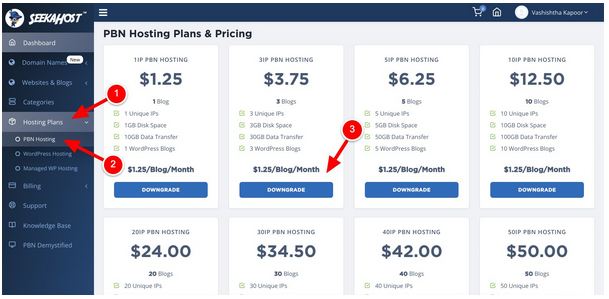
Before you create a PBN blog in your SeekaHost.app control panel, you need to checkout with any of the PBN plans.
After you choose any of the PBN plans, go ahead with the standard checkout process.
Step 3: Add a PBN
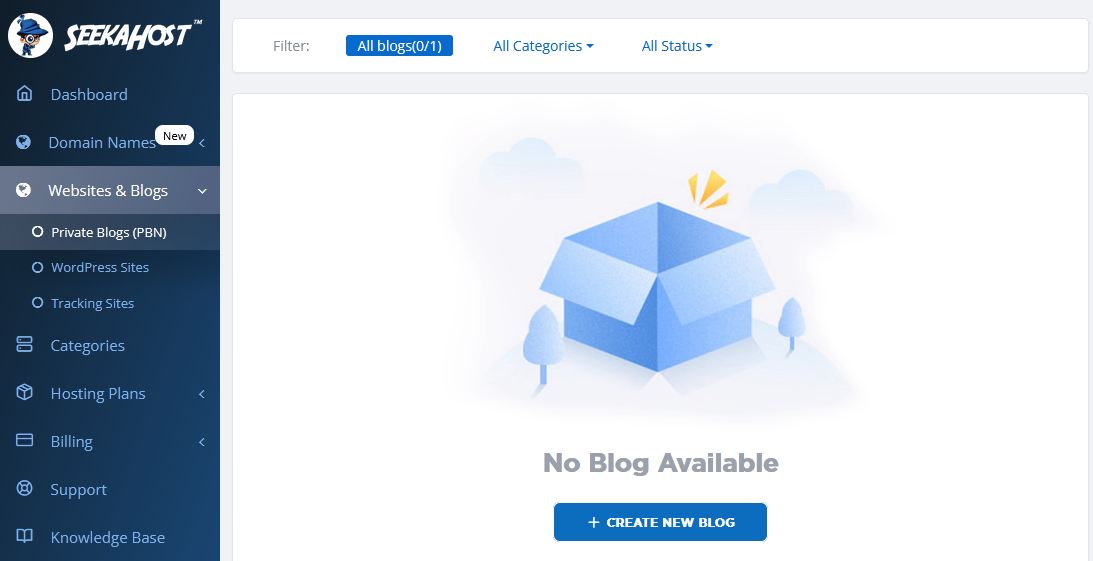
Once you purchase a PBN plan, simply go to the Websites & Blogs section on the left-side. Click on the drop down and choose Private Blogs (PBN). Then, click on Create New Blog.
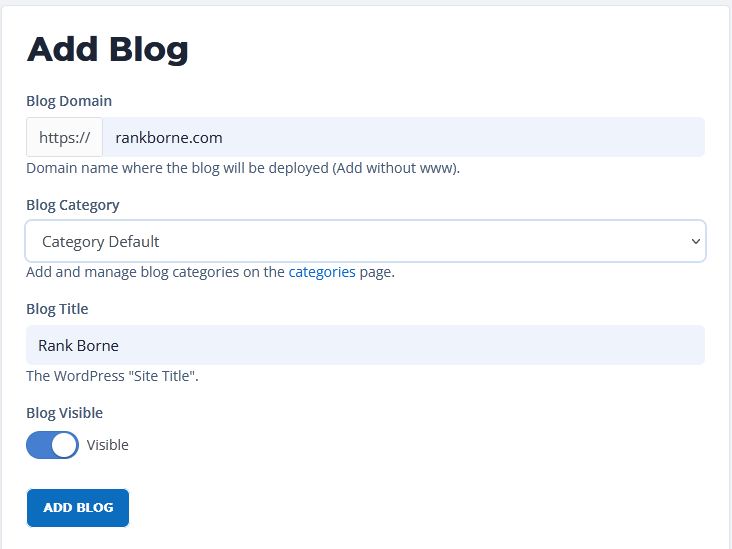
Enter the blog domain name with extension. Here, I have used rankborne.com to be added as a PBN.
You can set the blog category on the categories page or proceed with the default category.
Enter the Blog Title, toggle the blog visibility to Blue, and click on Add Blog.
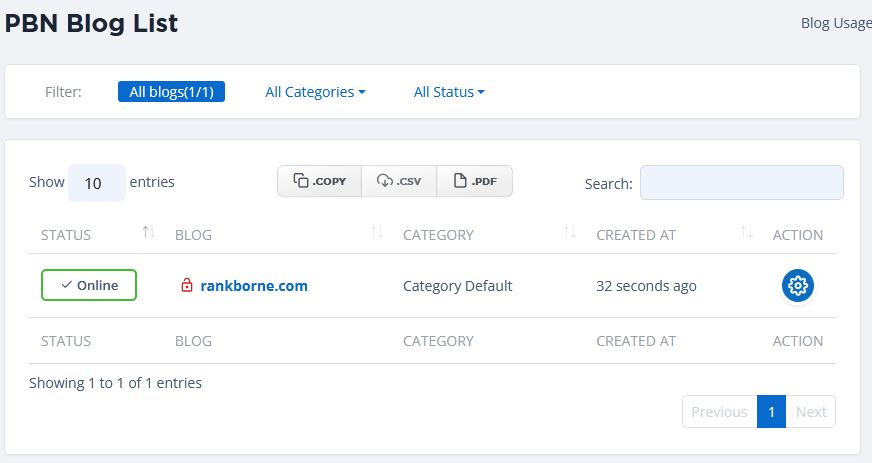
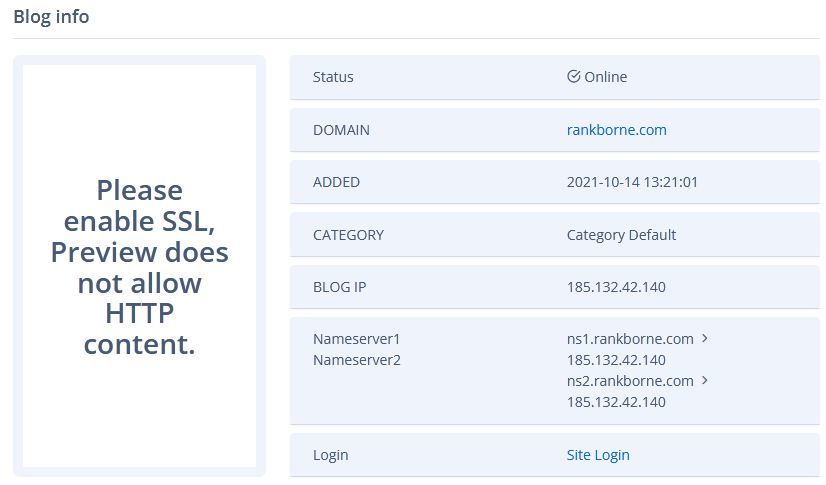
In a few seconds, your domain will get added to the PBN Blog list. Now, you can point your domain nameservers correctly.
Step 4: Pointing Nameservers Correctly
Click on the Setting icon under the Action tab.
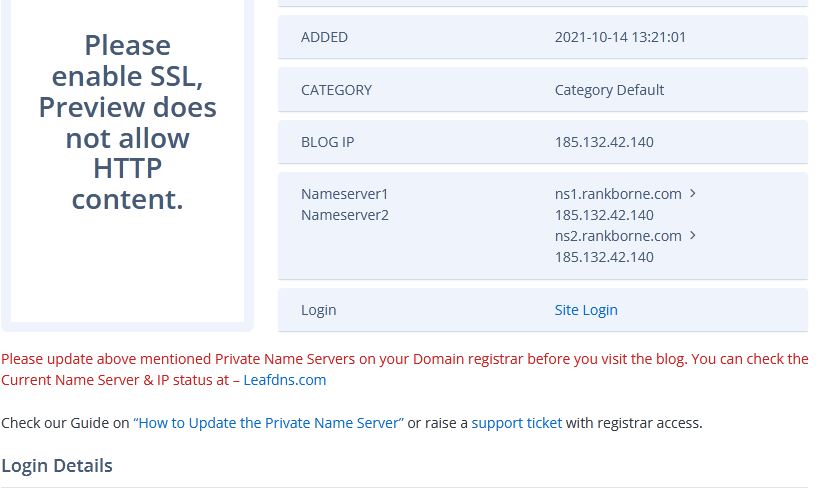
Copy the nameservers in notepad, so you don’t have to visit the PBN blog list again.
Go to Domains Names, and click on Domains. Look for the domain name you registered, and continue by clicking on the settings.
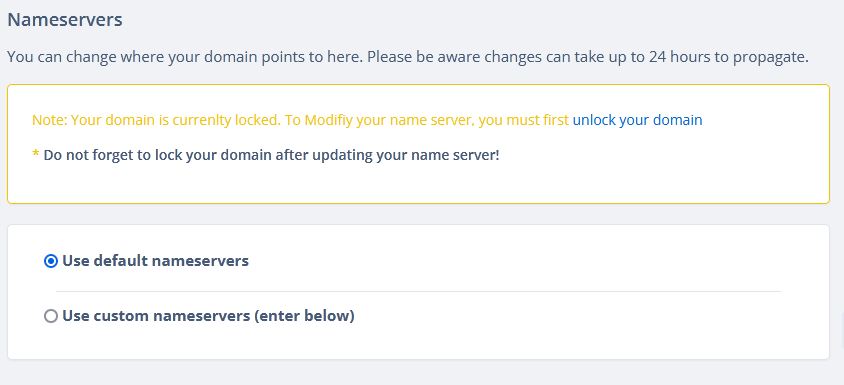
Now you need to go to the Nameservers section to modify the nameservers.
As you can see, your domain is locked. To modify the nameservers, you need to unlock it.
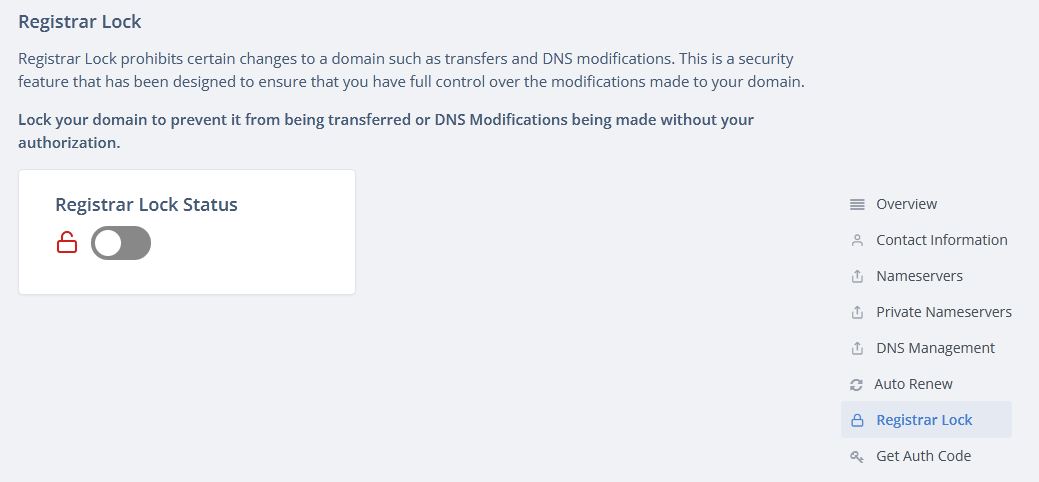
So go to the Registrar lock section and toggle it to unlock mode.
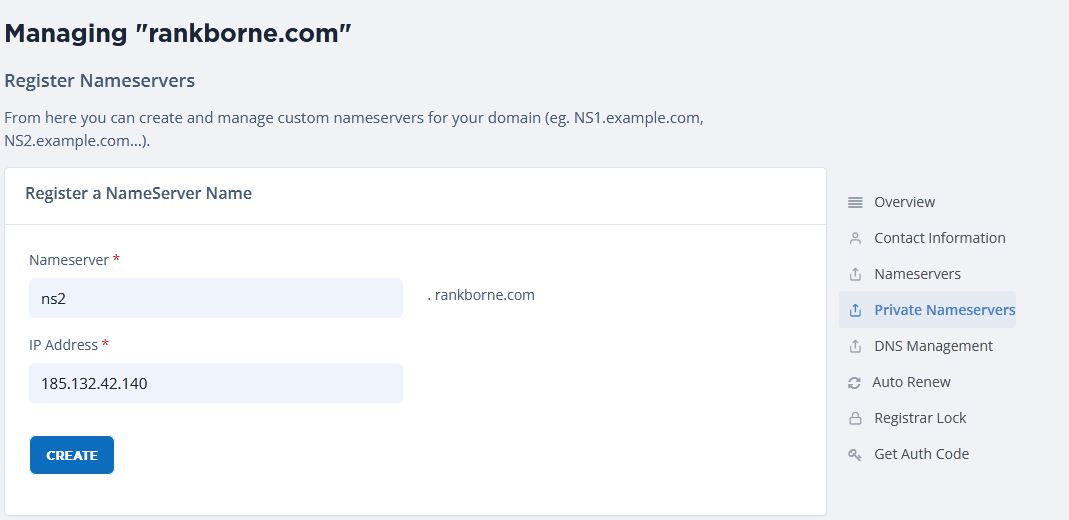
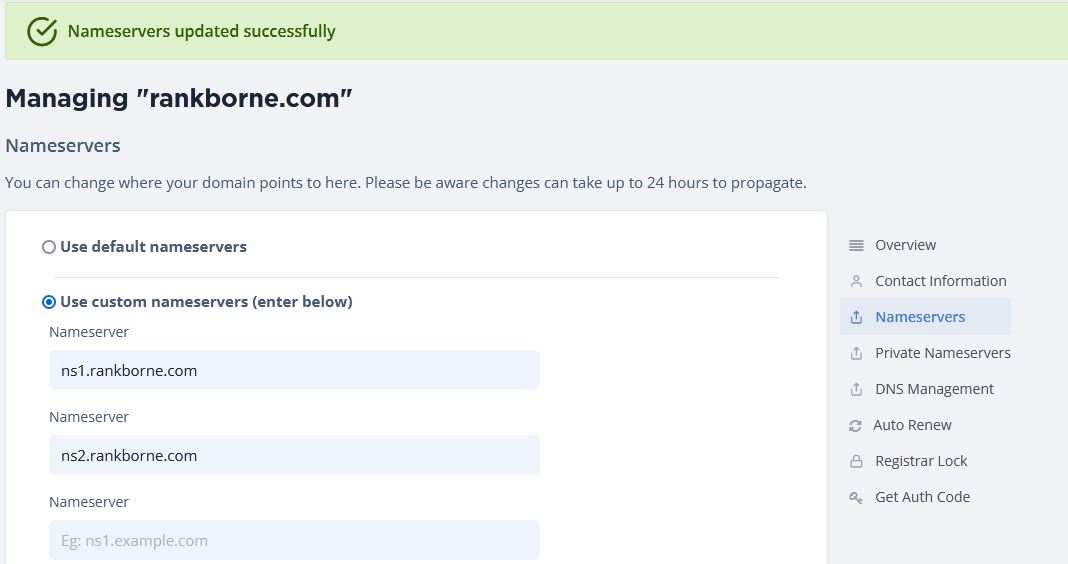
Now go back to the nameservers section, choose Custom namesevers, and enter the two nameservers.
Finally click on Change nameservers. You will receive a message Nameservers updated successfully.
You should again lock the domain using the Registrar Lock option.
Now go to the Websites & Blogs > Private Blogs, and click on settings.
You need to check whether the nameservers have been updated or not.
Step 5: Check Nameservers status
Click on Leaddns.com and check the nameserver status.
As you can see, the nameservers have been updated successfully. Now, you can proceed further by adding an SSL to your site.
Step 6: Add An SSL
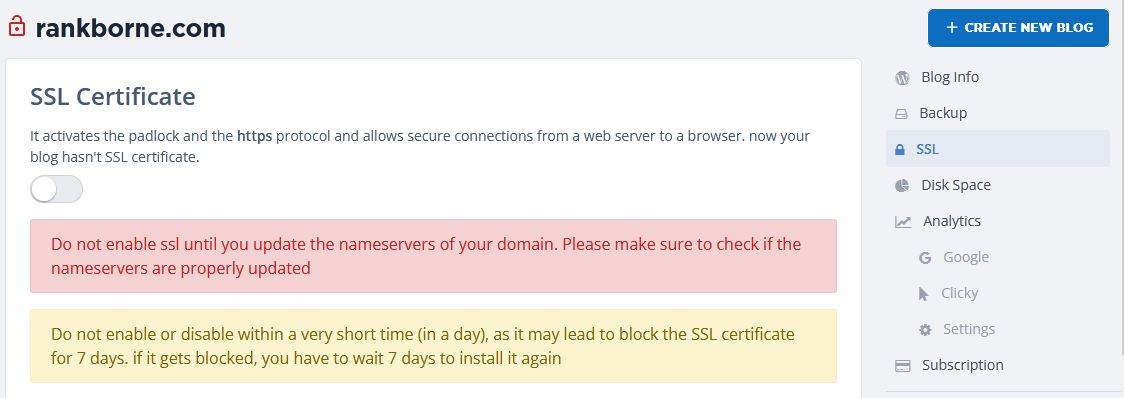
To add SSL to your site, go to the SSL section on the right-side under domain settings.
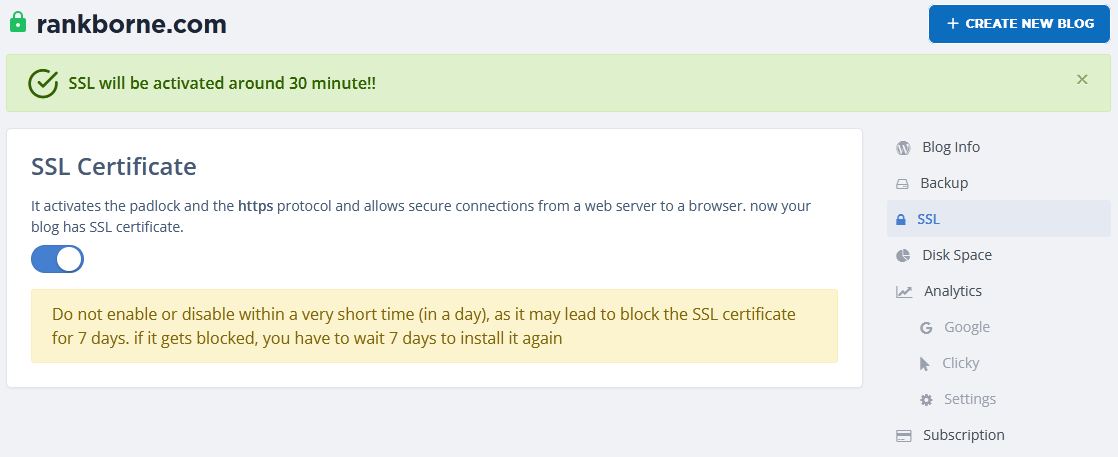
Toggle the SSL lock to enable it at one-click.
Congratulations, you just enabled an SSL certificate to your site at one-click.
Now, go to the Blog info, and click on Site Login to start customizing your WordPress blog.
The login details are sent on your email. So, you can get the username and password and login to your WordPress site dashboard.
Like you hosted the first PBN site, you can host as many as you want in your PBN.
Conclusion
If you are new to WordPress, you can checkout the steps to install WordPress theme and plugin.
You can check the disc usage, or even delete the PBN. There are some more features like Google Analytics to help you monitor the site traffic.
The CEO of SeekaHost Fernando Raymond has taken great approach to creating the SeekaPanel to make it easier for anyone to register a domain name and hosting it WordPress hosting services plans. Which are cheaper and faster than most other hosting providers in the marketing.
Once you are into the SeekaHost.app control panel, you can explore it fully.
I hope I was able to help you start a PBN with the SeekaHost.app hosting control panel.

