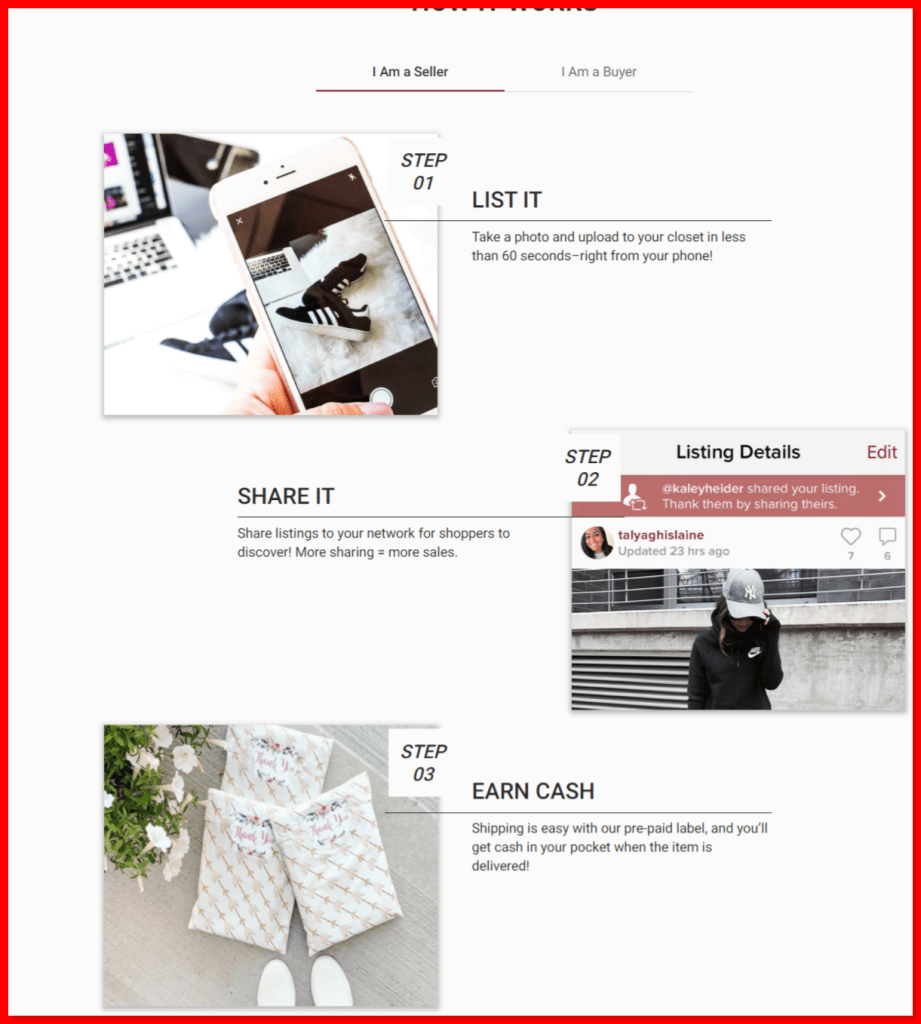
Poshmark is an online marketplace that enables sellers to start and run their own online storefronts. As a Poshmark seller, you’ll be in charge of your own inventory, pricing, shipping, and customer service. In other words, Poshmark is a great way to start your own eCommerce business with little up-front investment.
Sound interesting? Here’s everything you need to know about how to sell on Poshmark.
If you’re looking to clean out your closet and make some extra cash, selling on Poshmark could be a great option for you. In this guide, we’ll cover everything you need to know about how to sell on Poshmark, from creating your listing to packaging and shipping your items. Let’s get started!
How to Sell on Poshmark?

1. Create an account.
Creating a Poshmark account is free and only takes a few minutes. All you need is an email address and a password. Once you’ve created your account, you’ll be able to start creating listings for your products.
When creating your listings, be sure to include a detailed description of the item as well as all relevant information such as size, brand, condition, etc.
Buyers want as much information as possible before they make a purchase, so don’t leave anything out! Be sure to price your items fairly—Poshmark takes a 20% commission on all sales, so factor that into your pricing. Finally, choose appropriate categories and tags for your listing so buyers can easily find what they’re looking for.
2. Take photos of your products.
When taking photos of your products, make sure they’re well-lit and in focus. Customers want to see what they’re buying, so the more accurate your photos are, the better. Don’t forget to include close-ups of any details or unique selling points!
3. Write compelling product descriptions.
In addition to including the basics (e.g., size, color, condition), your product descriptions should be clear, concise, and persuasive. Why should a customer buy this product from you? What makes it special? Be sure to answer these questions in your listing copy.
4. Choose the right price.
When pricing your products, it’s important to strike a balance between making a profit and making a sale. If you’re not sure where to start, take a look at similar listings on Poshmark to get an idea of what other sellers are charging for similar items.
5. Adding Items to Your Poshmark Closet
To add items to your Poshmark closet, click on the “My Closet” tab at the top of the page. Then, click on the “Add a Listing” button. You’ll be prompted to enter information about the item you’re listing, such as the title, description, price, and photos. Once you’ve added all the relevant information, click “Publish” to list the item.
6. Promote your listings.
Once you’ve created your listings, it’s time to start promoting them! You can share them on social media (Facebook, Twitter, Instagram), with friends and family, or anywhere else you can think of. The more people who see your listings, the better chance you have of making a sale.
Poshmark offers a variety of promotional tools to help you get more eyes on your listings. To access these tools, click on the “My Closet” tab and then select the listing you want to promote.
On the listing page, scroll down to the “Promote” section and choose which tool you’d like to use. For example, you can share the listing on social media or pay to have it featured in Poshmark’s email newsletter.
7. Ship your sold items promptly
When someone buys one of your products on Poshmark, you’ll receive a notification via email (and/or push notification if you have the app installed on your phone).
Once you’ve sold an item on Poshmark, it’s time to package it up and ship it off to its new owner! Poshmark makes this process easy by providing customers with a pre-paid shipping label that they can print out at home.
To generate a shipping label, log into your Poshmark account and click on the “Orders” tab at the top of the page. Then, find the order for the item you sold and click “Ship.” On the next page, enter the required information such as the quantity being shipped and the delivery address. Finally, click “Generate Shipping Label” and print out the label at home.
Once you’ve packaged up your item with the provided label, drop it off at your local post office or shipping center and it will be on its way!
Conclusion
Selling on Poshmark is a great way to make some extra cash while decluttering your closet!
The process is relatively simple – just take some clear photos of your items, create a listing following the steps outlined above, package up your sold items using the provided shipping labels, and drop them off at your local post office or shipping center. And that’s it! You’ve successfully completed a sale on Poshmark.
Happy Selling!
Also read: How to sell online courses?